Quickstart
Install netclaw, run the setup wizard, and start chatting. Takes about 5 minutes.
1. Install
Section titled “1. Install”curl -sSL https://releases.netclaw.dev/install.sh | bashSee Installation for Windows, Docker, and build-from-source options.
2. Run the setup wizard
Section titled “2. Run the setup wizard”netclaw initThe wizard covers four steps for Personal posture (five for Team/Public — more on that below).
Pick a provider
Section titled “Pick a provider”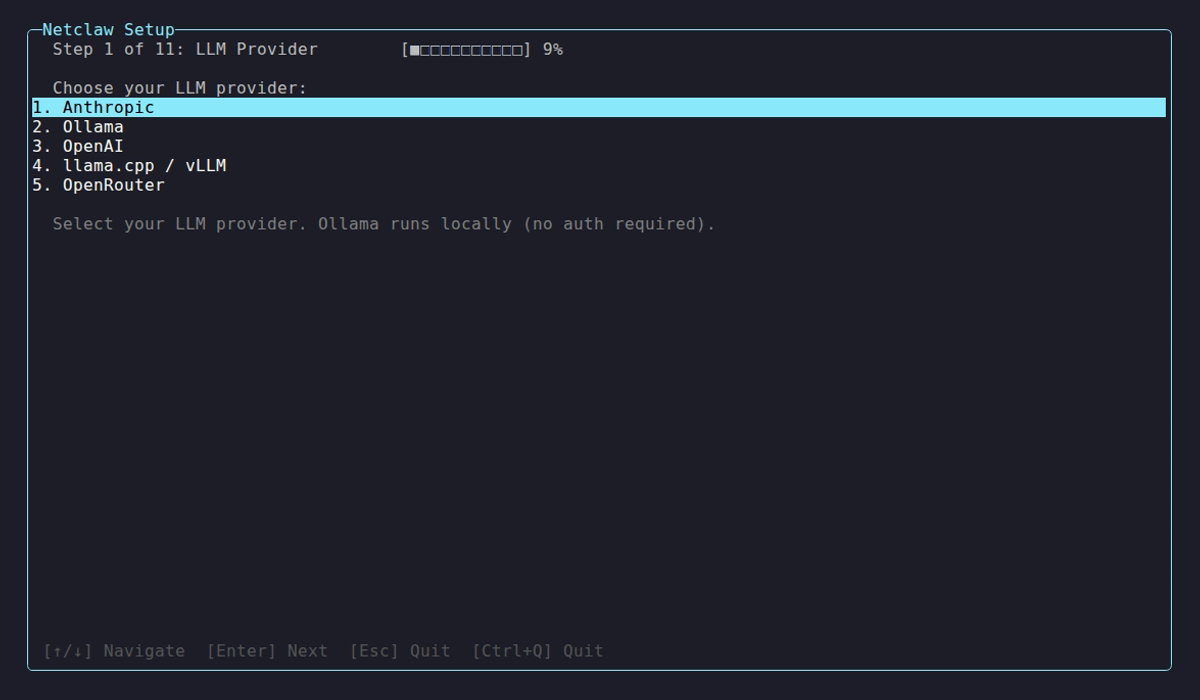
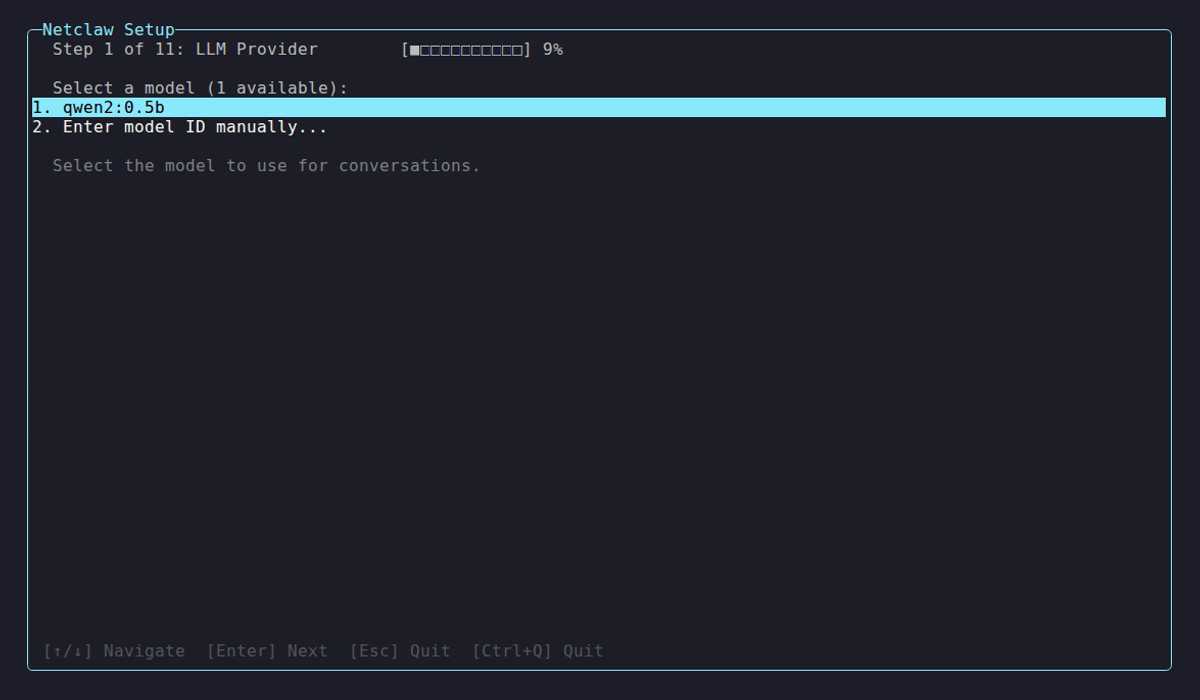
Choose an LLM provider and enter credentials. Self-hosted providers like Ollama need an endpoint URL. Once credentials pass a connectivity check, you pick a default model.
Use netclaw provider to add more providers later.
Set your identity
Section titled “Set your identity”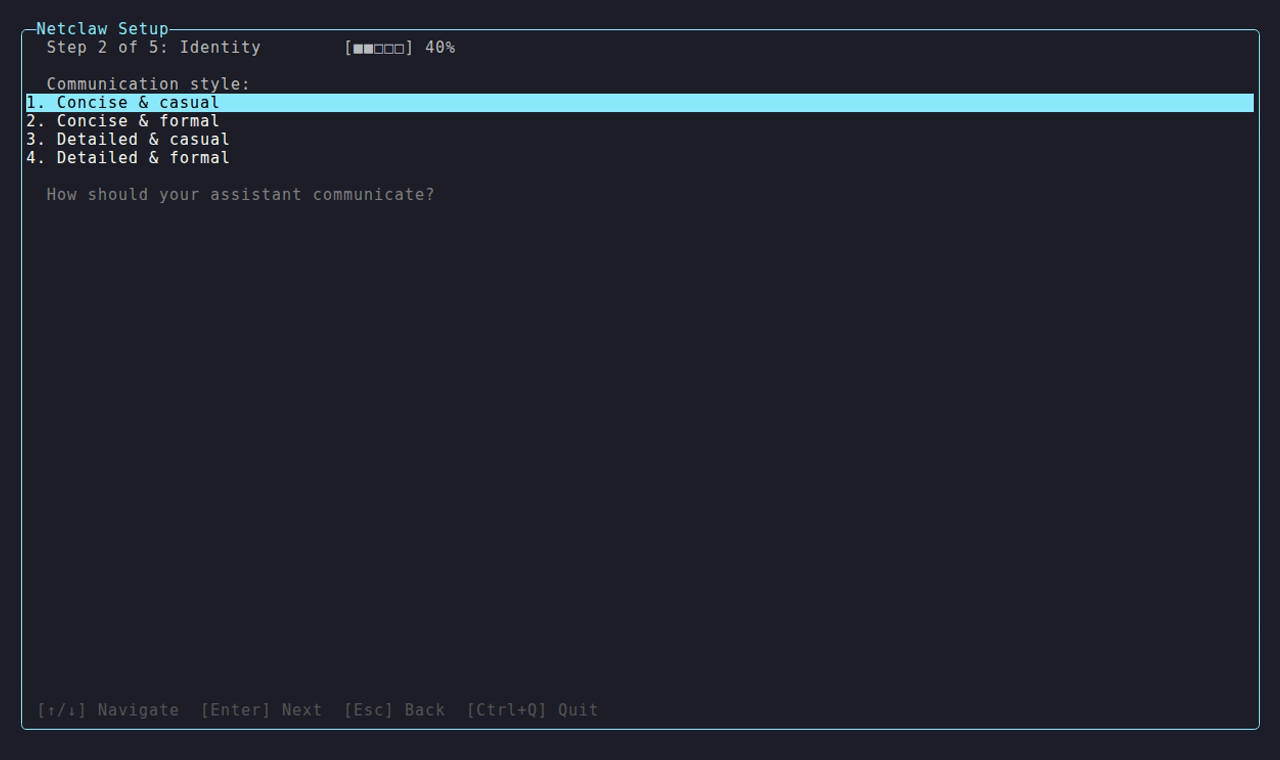
The identity step has four substeps in order: agent name → communication style → your name → timezone. The screenshot above shows the communication style substep. All four fields pre-fill when you re-run netclaw init on an existing install.
Set your security posture
Section titled “Set your security posture”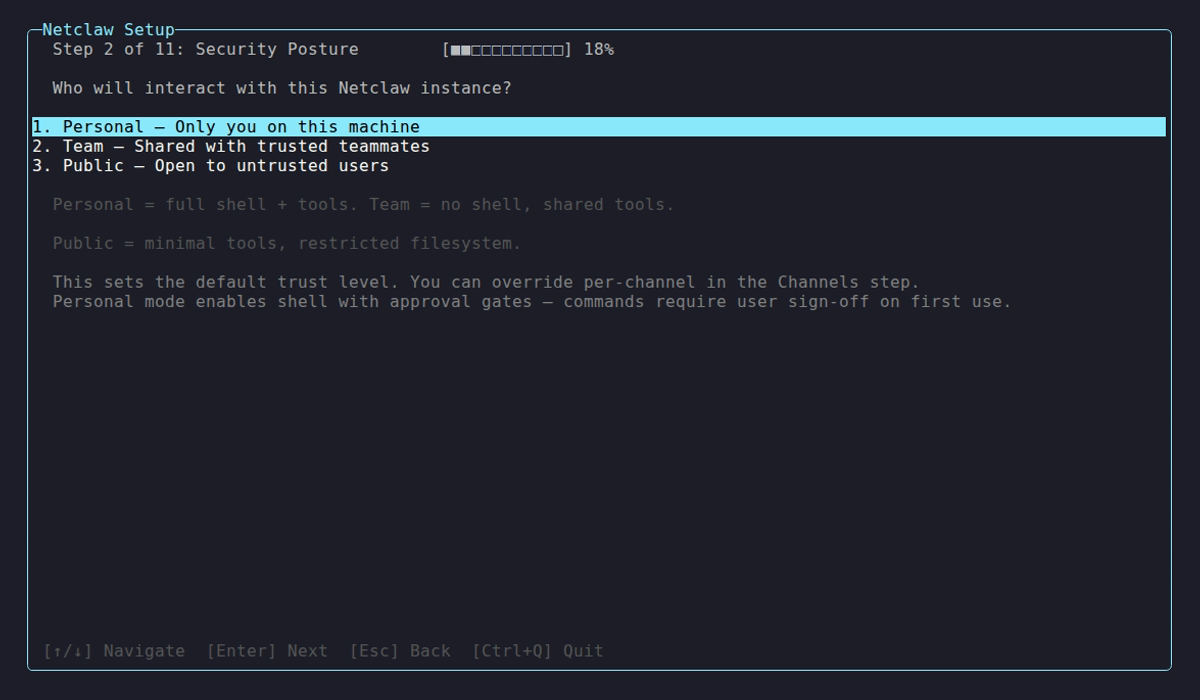
Pick how much you trust the environment. Personal is single-user with full tool access. Team and Public are progressively more restrictive. See Security Model for details.
Enabled features (Team / Public only)
Section titled “Enabled features (Team / Public only)”If you chose Team or Public posture, the wizard adds a step to select which feature sets are active. Personal posture skips this step and goes straight to the health check.
Health check
Section titled “Health check”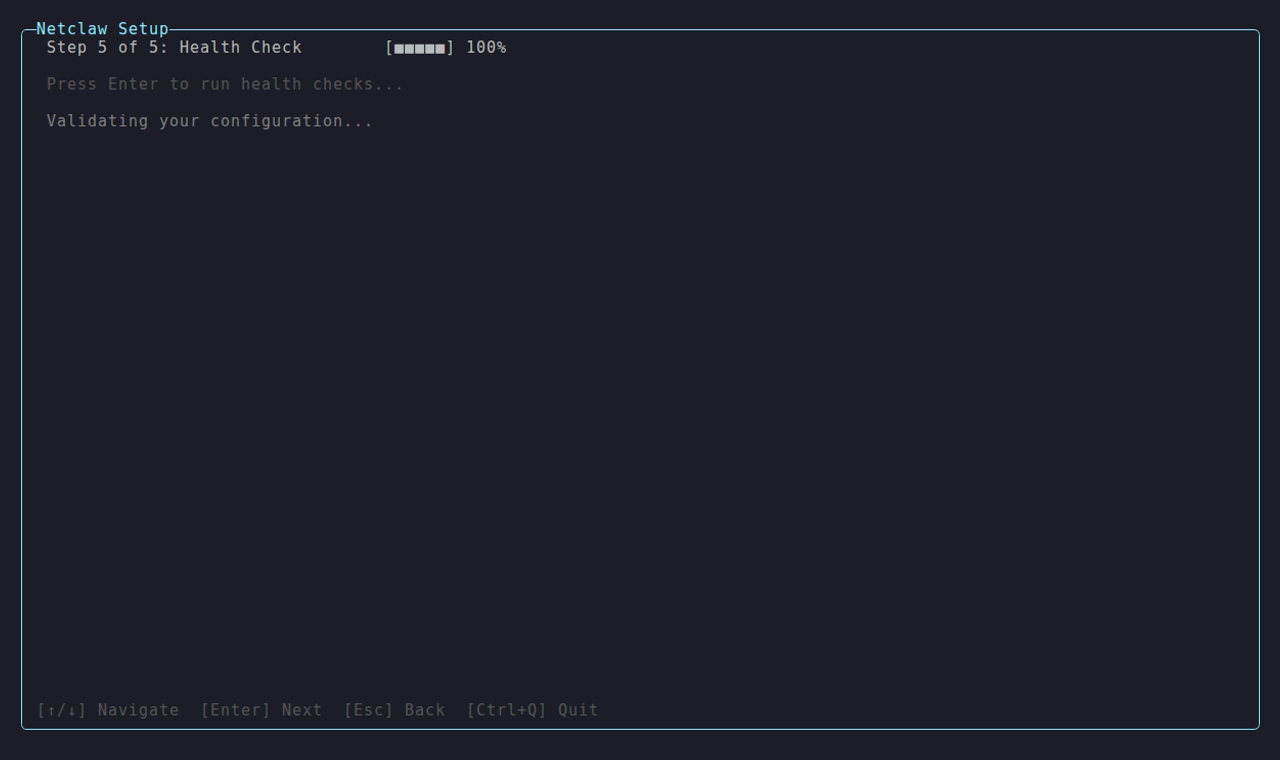
The wizard validates provider connectivity, writes config, and starts the daemon. When all checks pass, netclaw launches chat automatically — you land in the chat TUI without running anything else.
If the health check finishes with warnings, the wizard displays: “Setup complete with warnings. Run netclaw daemon start, then netclaw chat. Adjust settings with netclaw config.” Fix the flagged issue and retry.
3. Connect channels and features
Section titled “3. Connect channels and features”netclaw config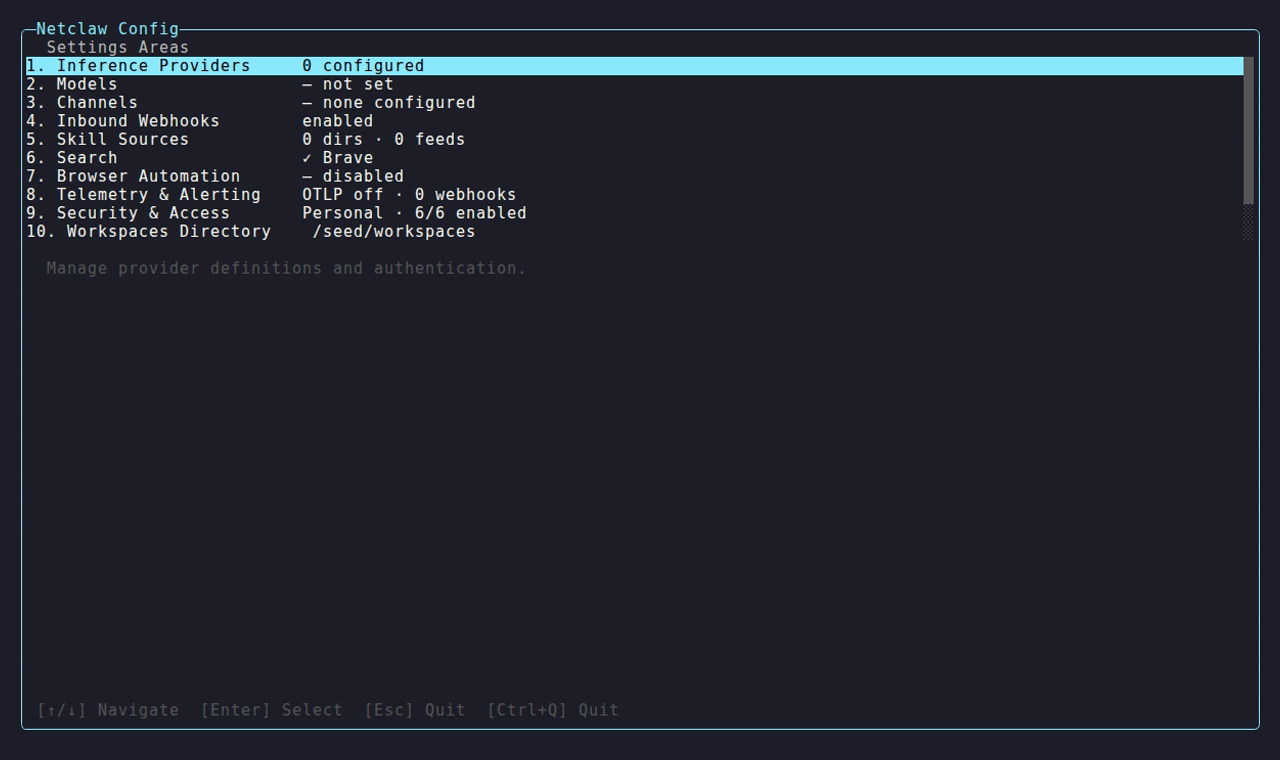
Each row is a configuration area with its live status — select one to set it up.
Channels (Slack, Discord, Mattermost), web search, network exposure, skill sources, webhooks, and browser automation are all configured here — none of them are set during netclaw init. Run netclaw config now to connect your first channel or enable search before you do anything else. Changes save as you make them; re-run it any time.
4. First chat session
Section titled “4. First chat session”On a clean health check, netclaw init drops you straight into the chat TUI. The agent introduces itself and kicks off a personality-bootstrapping conversation — it asks about your work, your tools, and what you need help with. This builds your profile so future conversations have context.
See Your First Conversation for the full walkthrough of what happens next.
Headless mode
Section titled “Headless mode”Don’t need the TUI? Send a one-shot prompt from your terminal:
netclaw chat -p "what's the weather in Chicago?"Pipe output to other tools with --json. See netclaw chat for the full reference.
What’s next
Section titled “What’s next”Init gets you to chat. To make netclaw actually useful — connecting it to Slack, enabling web search, or exposing it to your team — run netclaw config next.
netclaw config— connect channels, enable web search, set network exposure and skills- Your First Conversation — personality bootstrapping and your first real interaction
- Slack / Discord — full channel setup guides
netclaw doctor— diagnose issues if something didn’t worknetclaw status— check daemon health and connector states